Getting Started #

This guide is aimed to quickly provide you with the essential knowledge of the Damage FX Asset. It is assumed that you are already familiar with the Unity Engine, C#, and have a basic knowledge in shaders.

Thanks to the Amplify Shader Editor from Amplify Creations, it was possible to build the Damage FX Framework without writing a single line of shader code, except one code expression node, and still, using the shader editor!

It turns very handy since you can drop the Damage FX Function node onto your canvas, and start using it out of the box. The function itself can also be easily customized giving you total control over the Damage FX.

What if you don’t have the Amplify Editor? Don’t worry! The Damage FX comes with the PBR Metal, Specular and also Battleships shader samples, so you’re pretty much covered.

You will find the shader samples under the FORGE3D/DamageFX path in the material inspector.

Check with the Recommended Setup chapter of this manual and let’s get started by running the example scene!

Example Scenes #

You will find them under the Assets/FORGE3D/DamageFX path in your project folder.

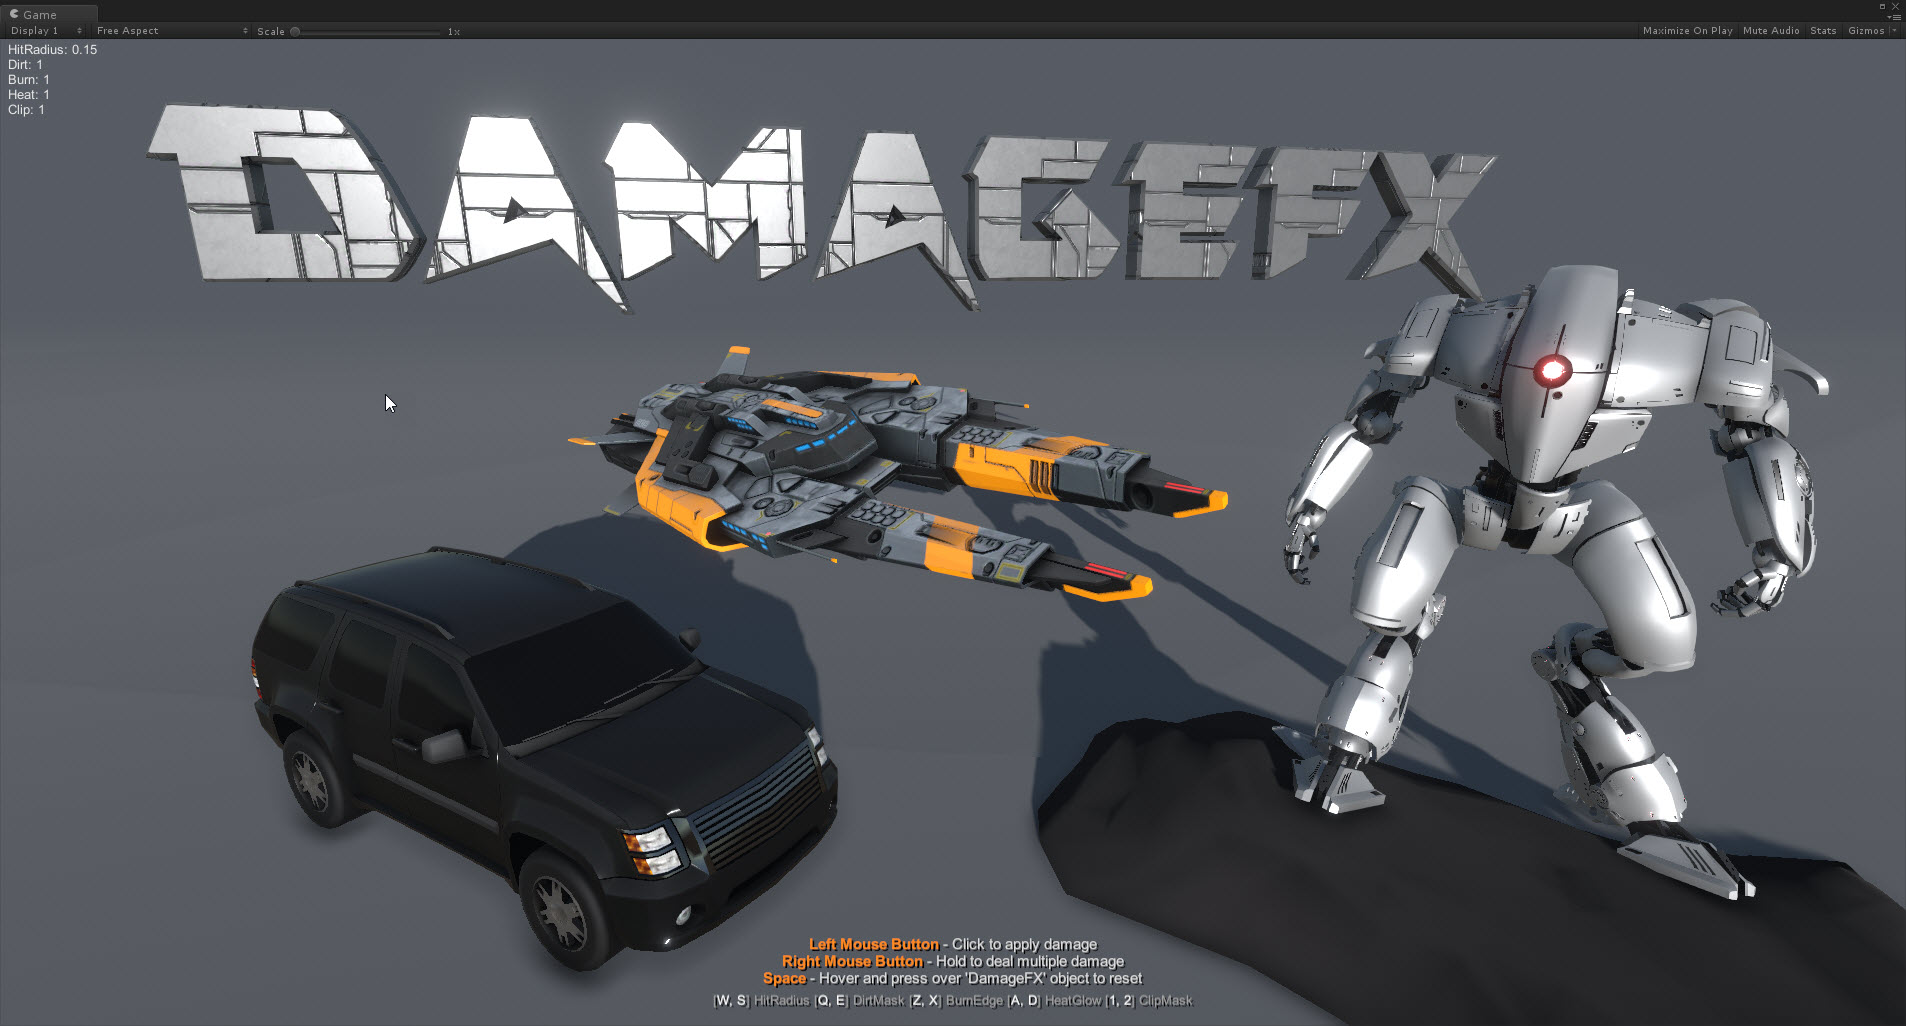
Both examples will provide you with the on screen help and values which will be updated by the  Damage FX Script Component to the Damage FX Shader on the next impact that you trigger.

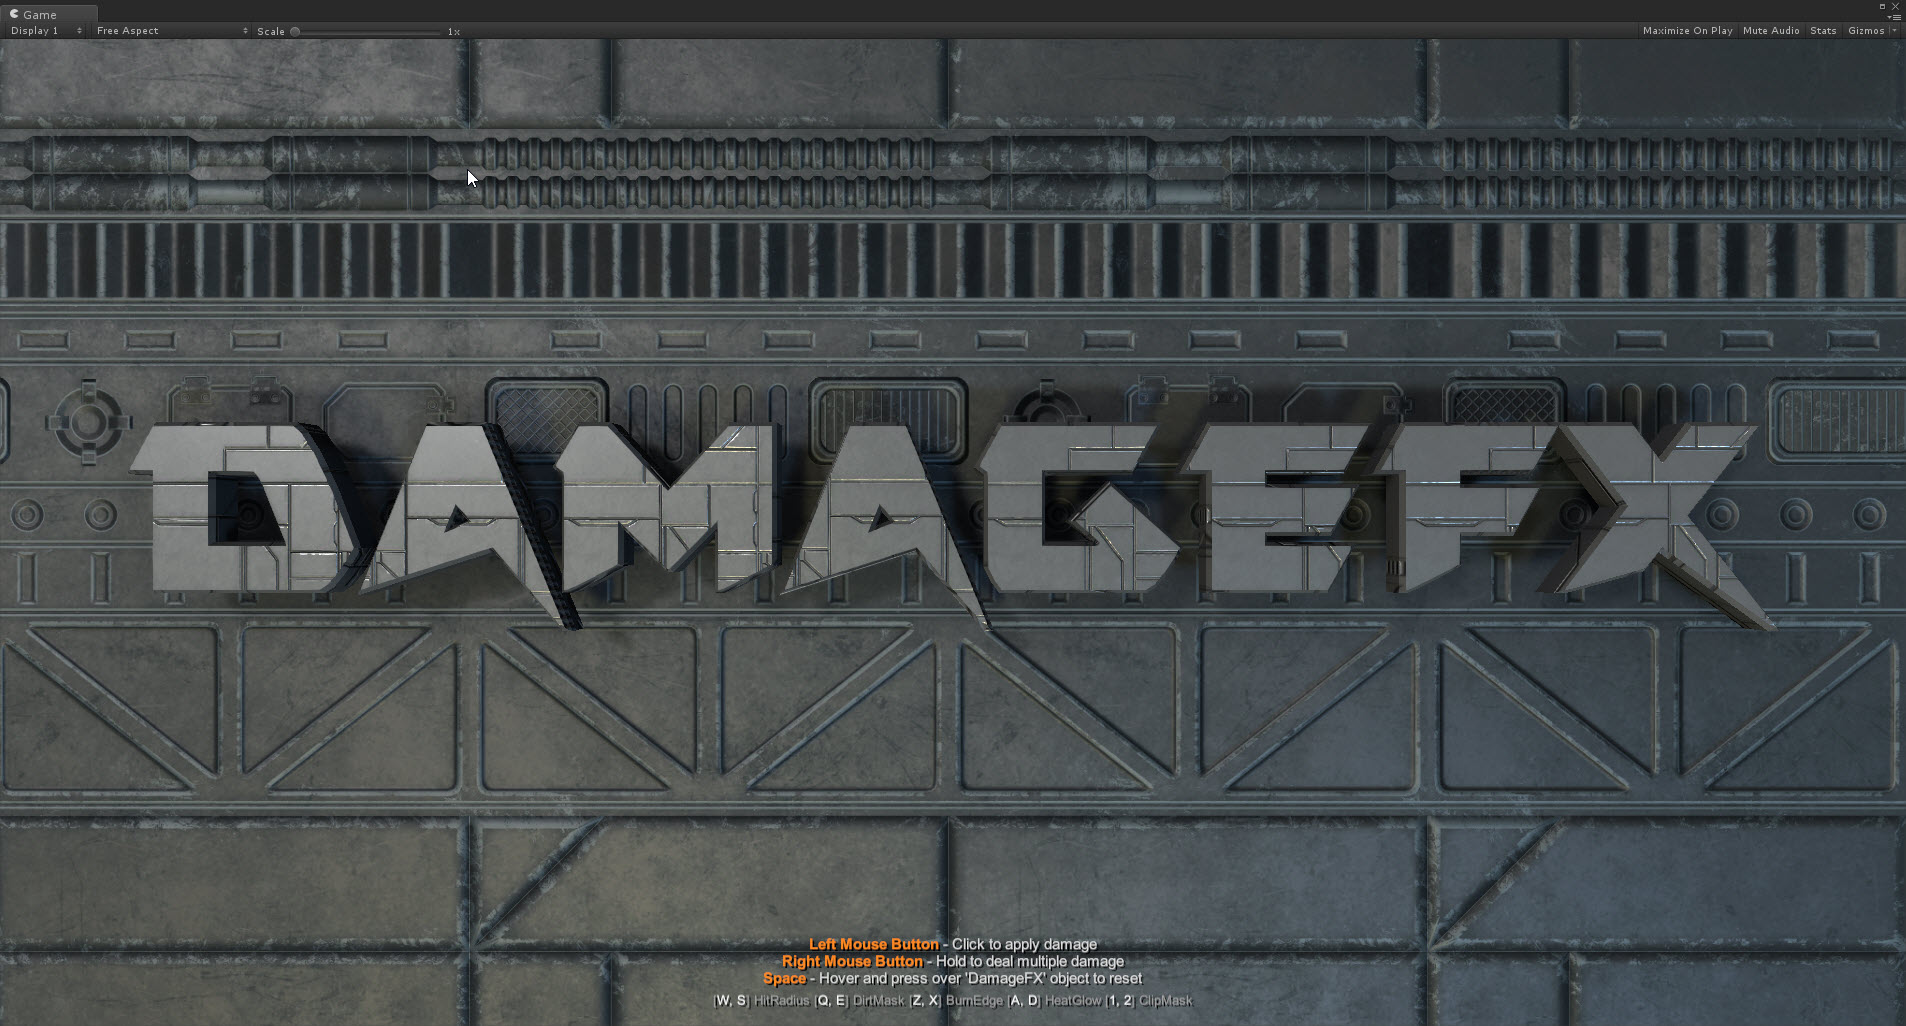
Damage FX Text Plate scene:

01_DamageFX_Plate.unity

The text and background tech plate meshes have the underlying geometry layer which demonstrates the most of the effect. Shooting at the text will reveal rust as its outer mesh becomes hidden on the damage application.

Damage FX Example Meshes scene:

02_DamageFX_ExampleMeshes.unity

There are three new mesh samples in the scene. Some of them contain multiple parts and various implementations.

How it works #

The Damage FX Object consists of three essentials pieces:

Damage FX Shader

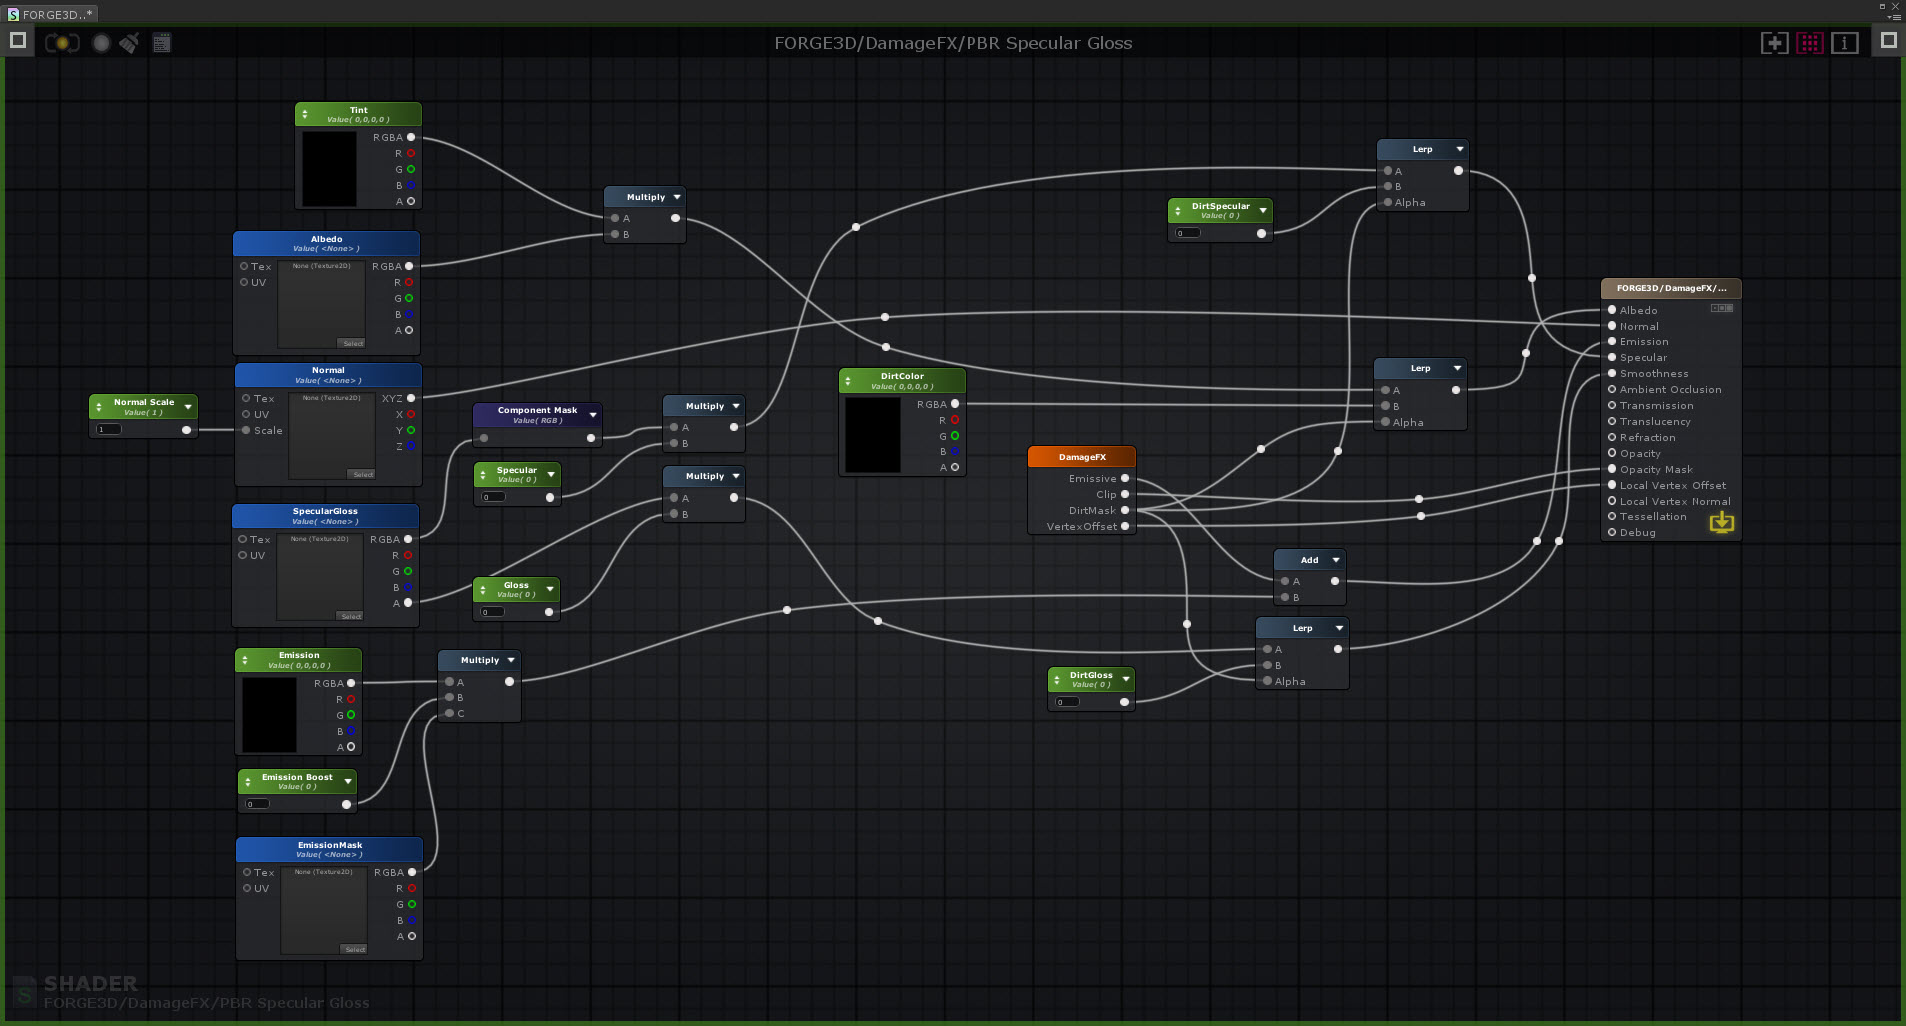
Let’s look at the basic application of the shader with the base layer which is rendering the initial or untouched mesh, and also the damage layer added by the Damage FX function. The universal example would be FORGE3D/DamageFX/PBR Specular Gloss shader in our case.

The damage is added dynamically upon providing an object space point and non empty value to the shader data array. The shader function will iterate through the available impact points building the required masks given the following values:

  • Hit Radius – Defines the size of the impact. Note the mesh import scale (Unity Mesh Inspector) may affect the tiling of the damage masks. Ranges [0f, ~]. Setting a zero value leaves a very subtle effect.
  • Dirt Mask – The strength of the dirtiness around the impact in a range of [0f,1f].
  • Burn Edge – The amount of burn color applied to the inner edge of the impact usually in between the clipped spot and the dirt layer. Ranges [0f, 1f]. This parameter works best with the positive Clip and will fade over time. The fading can be controlled from the Damage FX Script Component.
  • Heat Glow – Is a glowing spot on top of the impact. Ranges [0f, 1f]. This parameter will fade over time and can be controlled from the Damage FX Script Component.
  • Clip Mask – The amount of clip applied at the impact point. Ranges [0f, 1f]. The lower the value the less is the clip up to none. A value in between the range, e.g. 0.5f, leaves the most of the rough edges at the impact hole.

These five values are individual per impact point and you can experiment with them in the real-time by launching the example scenes.

Note the default configuration is set to 200 impact points per Damage FX Object. Adding more points over the limit will overwrite existing ones from the beginning of the shader array.

Damage FX Script Component

Assets/FORGE3D/DamageFX/Scripts/DamageFX.cs

In order to control the Damage FX Shader, an instance of the script should be present on each Damage FX Object. The script component handles the data processing for impact spots and fades the heat values over time.

Use DamageFX.Hit() method of the script to add new impacts to the surface of the mesh as shown below:

Here is the simple code snippet that will add the damage point to the Damage FX Object under the mouse cursor on left mouse click:

1
2
3
4
5
6
7
8
9
10
11
12
13
14
15
16
17
18
19
20
21
22
23
24
25
26
27
public float HitRadius = 0.1f;
 
public float Dirt = 1f;
 
public float Burn = 1f;
 
public float Heat = 1f;
 
public float Clip = 0.7f;
 
private RaycastHit _hitInfo;
 
private void Update()
 
{
 
if (!Input.GetMouseButtonDown(0)) return;
 
var screenRay = Camera.main.ScreenPointToRay(Input.mousePosition);
 
if (!Physics.Raycast(screenRay, out _hitInfo, Mathf.Infinity)) return;
 
var dfx = _hitInfo.collider.GetComponent<DamageFX>();
 
if (dfx != null) dfx.Hit(dfx.transform.InverseTransformPoint(_hitInfo.point), HitRadius, Dirt, Burn, Heat, Clip);
 
}

Colliders

The Damage FX works best with precise colliders that match its mesh geometry, e.g. mesh colliders.

If the distance between the closest mesh point and the collider hitpoint is bigger than the hit radius, then the effect won’t be visible at all. It’s important to provide a properly designed colliders to your Damage FX Objects.

The key is to get the impact from the hitpoint of the raycast against the collider to the original vertex position of the mesh. Sometimes this is not possible, for example, because you want to use the rigid body on the same object which will cause Unity to throw an error. Here’s a workaround to it. Remember, that you can use a convex collider or any number of simplified ones instead, either detach the mesh collider in the Awake(), and move it along each frame. You can also try using any third party tools/assets to help with generating a series of convex colliders covering the mesh.

Material Settings #

Depending on the shader, the amount of available material parameters may change, although there are always a number of parameters that added with the Damage FX Function.

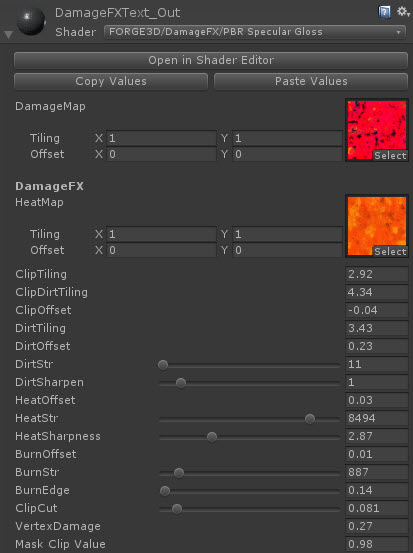
You should be already familiar with the Damage FX Script method input values from the previous chapter. In the image example the material values look somewhat identical. There are more parameters though and also two texture samples for damage masks and produced glow. The DamageMap holds the clip and dirt masks, while the HeatMap is used to generate the UV animated effect along the burn edge.

As an addition, there is a Vertex Damage parameter that will offset the geometry points affected by the impact along its normals based on the clipping mask.

You can tile clip and dirt masks by adjusting in values in the inspector, while the heat map should be tiled by the sampler’s x and y instead. It is also important to know that you might want to adjust your tiling when setting a material for a new mesh.

That said, with all the given parameters of the Damage FX Material, you can control its clip, dirt, heat and burn values globally. Keep in mind that the Function input values apply individually per point and based on your global settings in the material of the Damage FX Object.

Damage Map UV2

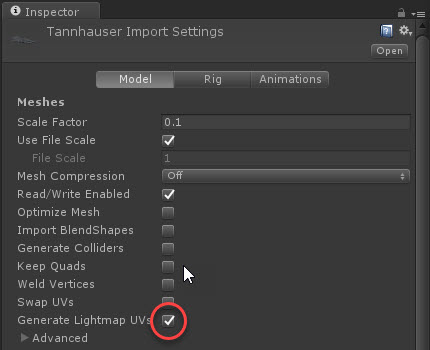
The DamageMap sampler uses the UV2 channel. Make sure you have a UV2 map on your mesh by Generating a Lightmap UVs in Unity. This option is available in the Mesh Import Settings.

Debugging Damage FX Object #

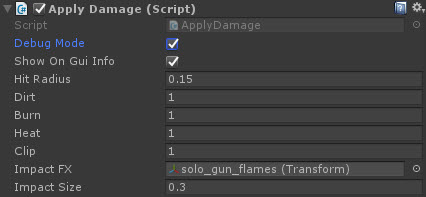
Usually you would want a weapon controller to call the Damage FX Script Component when you hit an object with a weapon. Following this approach to set the look of the damage on the object might become time consuming. There is a more quicker way with the ApplyDamage.cs script which implements all the necessary tools for the task.

If you’re not familiar with this script, just refer to the example scenes.

Notice the Debug Mode checkbox which turns the object itself into a real time impact generator given the values from the user input. Enable the Debug Mode and move it around. Use the hotkeys such as W-S, 1-2 and Space to reset.

Additionally, you can set the Damage FX Script Object Decay Tick Rate and Decay Per Tick to zero to stop the glow from fading.

Adjusting the total number of impacts #

Damage FX Script Component:

Modify the constant value of the Damage FX Script Component:

Assets/FORGE3D/DamageFX/Scripts/DamageFX.cs

Amplify Creations Shader Editor Users:

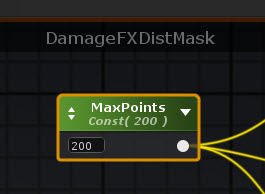
Open the DamageFXDistMask function from the Assets/FORGE3D/DamageFX/Shaders/ and change the number of MaxPoints constant matching the number set in the script component. Recompile both Damage FX Functions and all shaders affected by this change.

Modifying shaders by hand:

Open the Damage FX Shader sample and search for the existing number of points in the search field of your favourite editor:

Using Damage FX Function #

The Damage FX Function can be reused within the Amplify Shader Editor. It fits perfectly into any existing node framework. As you already might know, the function itself is all it requires to add a Damage FX support to your existing shaders. Using it for the first time, please make yourself familiar with the output nodes and where you can connect them.

The Damage FX Function can be reused within the Amplify Shader Editor. It fits perfectly into any existing node framework. As you already might know, the function itself is all it requires to add a Damage FX support to your existing shaders. Using it for the first time, please make yourself familiar with the output nodes and where you can connect them.

Suggest Edit